Build a quotation tool with Formspree
Collect data from your webapp created with Appizy. In this article we build a quotation system with Appizy and gather customer inquiries via Formspree.
This article focuses on transforming a quotation spreadsheet tool into a web-app to get customer leads directly from you website. We recommend you to download the “Quotation” sample from the converter page and observe the file as you go through this article.
Setup the endpoint: Formspree
What is an endpoint or backend form?
Appizy creates a web-app that runs in the browser of the visitor. This web-app does not have the ability to collect data or to send you an email unless you plug it to an endpoint (a service running in the cloud) like Formspree. This backend or endpoint will be the place where all the data will lend.
Account and form creation
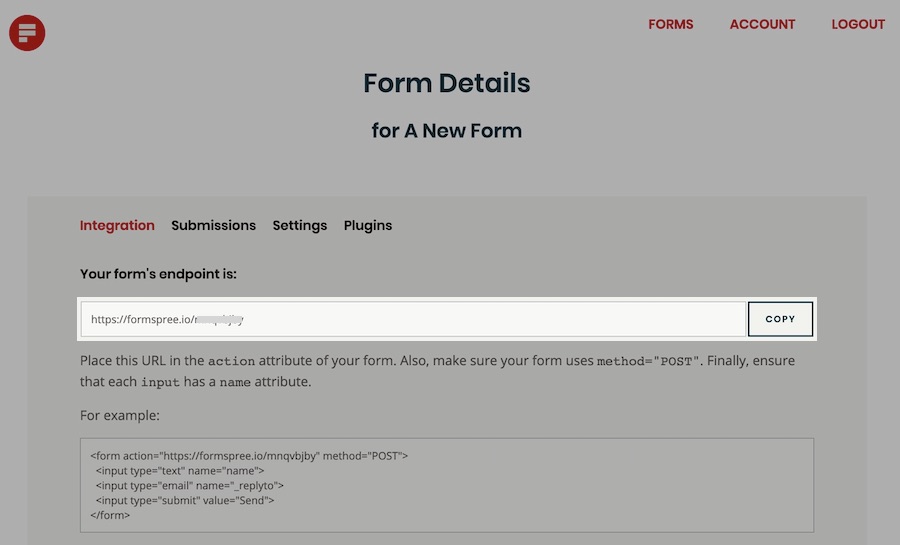
Creating an account on Formspree takes a few seconds. With the Free plan you get unlimited forms with 50 submissions. In Formspree dashboard create a new form and give it a name. On the next screen you will see a URL in the field “Your form’s endpoint”. Copy this URL and you are ready to go.
Prepare your spreadsheet
Let see how to prepare our file to tell Appizy to send the correct data. Note: the sample spreadsheet contains all elements described in this section.
Named cells
The key point here is named cells. Appizy will treat those cells in a way that their name is kept and afterwards send those information to Formspree (once your visitor hit the button “Send”).
Input cells without formula
By definition, Appizy creates input fields only for cells being referenced into another cell’s formula; all others are frozen for the end user. This is also the case in our spreadsheet for the company and the name of the customer. The workaround here is to write a formula in a hidden tab, which references the cell we originally want to be our input. Check the hidden tab in the example spreadsheet.
Setup Appizy
Once you have named the cells in your original Excel file and created a form in Formspree, it is time to launch Appizy. Note that this setup requires at least a PRO plan. You can also test it with the quotation sample file offered on the converter page.
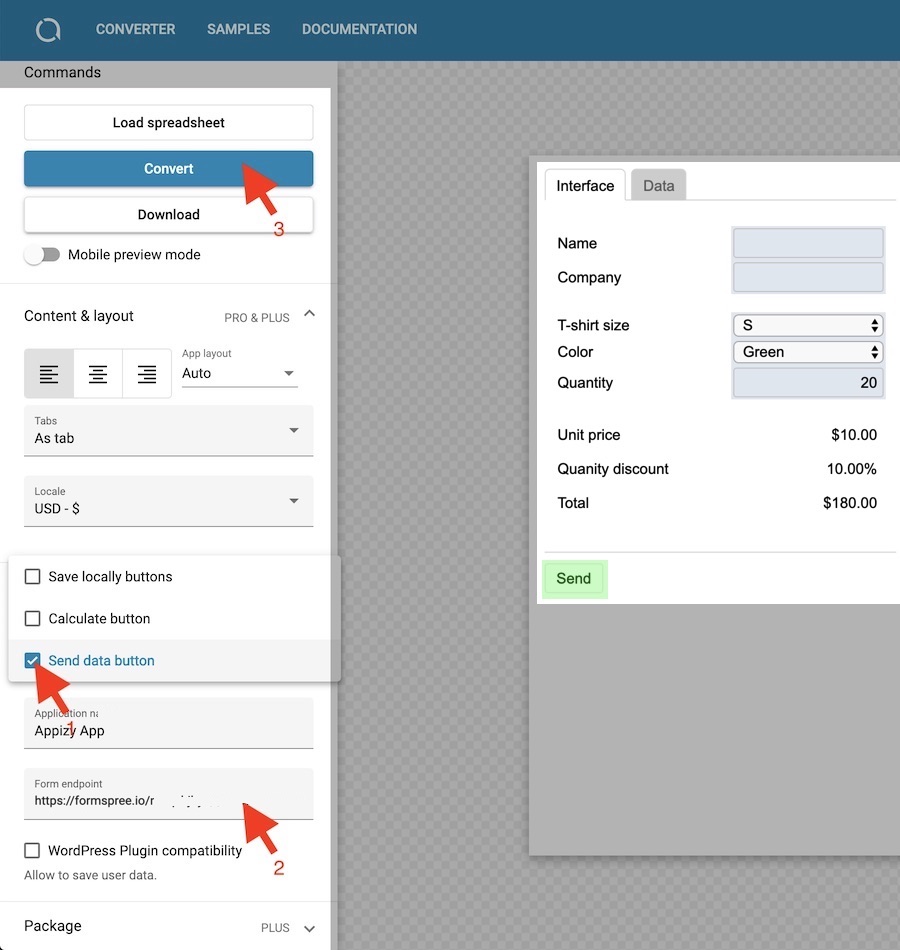
In the setting panel select “Integration" » “Toolbar” » “Send data button”. Then paste the content of the action form you copied in the first step in the “Form endpoint” field. That’s it, click convert. In the preview of your app, you can see a Send button just appeared below the application.
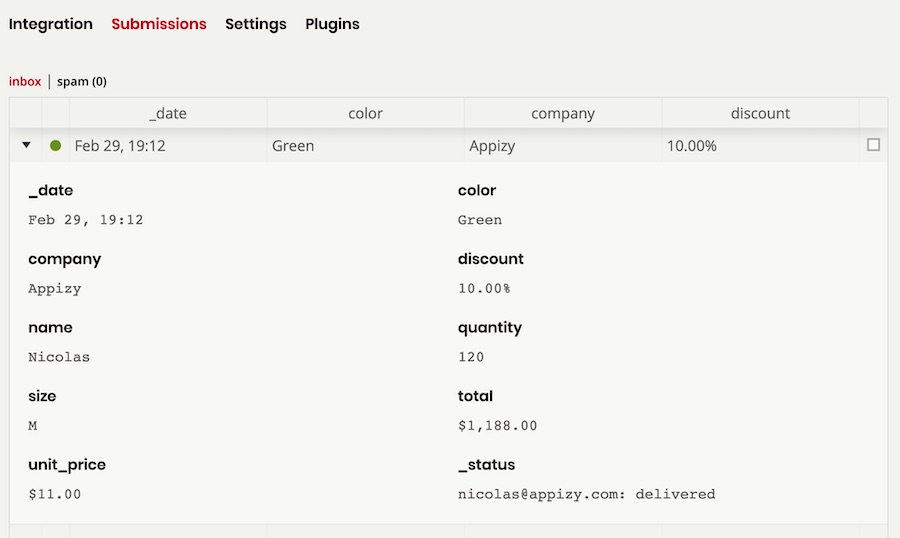
Download the code and you are ready to test how it works. Fill the quotation form and click “Send”. You will instantly get an email from Formspree warning you about a new submission. Go to the endpoint dashboard to review the data.
Final words
Going further
We reviewed the 3 steps to gather data from our quotation web-application into Formspree. This process relies on named cells in the original spreadsheet. Once converted in Appizy with the right settings, the webapp will display a new “Send” button. When the user hits the button, the content of the cells is sent to Formspree.
This endpoint/backend feature is a brand new feature of Appizy. Do not hesitate to send us your comments or questions. We would be happy to hear from you.
Going further with built-in plugins
Formspree is integrated with Zapier, GoogleSheet, Slack and much more. This tools connect the web-app with third party services to automate tasks and save time. This is very powerful and can help you leverage on your web-app to maximize the lead generated with your brand new quote system (mailing list integration, customer relationship software, …).